
For 1 egg: 1 Tbs ground flax seed, mixed with 3 Tbs hot water
For 2 eggs (in some recipes, this amount can substitute for 1 large egg): 2 Tbs. ground flax seed, 1/4 cup hot water
You can either just let this sit for a while and then add to the recipe, or you can cook the flaxseed and water until gelled, let it cool and then if desired you can whip it to add more lift to your baked goods. You may need to add 1-2 Tbsp more water for the cooked and whipped version.
Another thing I've done when I want to substitute for 1 to 4 eggs is just add 1/4 cup or so of flaxseed meal to my recipe and increase the liquid a bit if needed. Flax seed contains quite a bit of oil, so you may be able to omit or reduce other oils in the recipe. It's pretty flexible, so you can play with the amounts without hurting your baked goods too much.
I do recommend using ground flax seed, or grinding it in a coffee grinder or spice mill to release the oils and the nice sticky compounds in the flaxseed that make it a good binder in baked goods.
If you're trying to make something like waffles and they are sticking, either grease your griddle better or try adding another tablespoon of flax seed and the corresponding amount of water.
Showing posts with label Baking Basics. Show all posts
Showing posts with label Baking Basics. Show all posts
Thursday, February 11, 2010
Saturday, May 26, 2007
Basic Sourdough Baking
Making bread from sourdough starter is so easy. I just take a cup or so of the (room temperature) starter and mix it with a cup each of flour and warm water. (Don't forget to feed your starter also--100 grams each of flour and water makes about a cup of starter.)
I let that double; it's called the sponge. Then I mix a teaspoon or two of salt into another cup of flour (the general rule is about 2 teaspoons of salt to a regular-sized loaf of bread), mix that into the sponge, and add more flour until it's a bread dough consistency. Add oil, herbs or sugar if desired--I like to add about 2 tablespoons to 1/4 cup each of oil and honey.
You don't want the dough to be too stiff, but you can knead quite a lot of flour into it . . . I probably usually end up working a total of about 3 cups of flour into the sponge, including the cup I mixed with salt. The dough should still be just slightly sticky after kneading, but firm enough to hold its shape. If you get it too stiff, just add a little warm water or oil.
Next, flour and/or grease your bread pan (I use a baking stone, which I just flour) and put the dough on it. If you're using a stone, shape the loaf taller than it is wide because it spreads out to the sides as it rises. Sometimes I lightly slash the top of the loaf to allow it to rise without "exploding" unevenly.
Cover the dough with plastic wrap or something and let it rise till double, then bake it. I usually put the breadstone with the loaf in the cold oven, then turn the oven on to 350 degrees F and let it bake for 40-60 minutes or until it looks done.
I've been surprised at how un-sour it tastes; it's not nearly as sour as commercial sourdough. The longer it proofs the more sour it will be, and being refrigerated will give it a sharper flavor. If you find it too sour, you can always add a little sweetener or a teaspoon of baking soda to cut the acidity.
Depending on what you add to it, you can make many different types of bread, rolls, even cinnamon rolls. You can also use the sponge or fresh sourdough starter as the acid in quick breads, with no extra rising time. Mixed with baking soda it works just like baking powder. The general rule is no more than a teaspoon of leavening per cup of flour, but I usually use 1 to 2 teaspoons per batch of bread or muffins. I'll be posting a sourdough muffin recipe on Restricted Gourmet soon.
Sourdough Starter
I've found sourdough very easy to use, and it's completely free of most allergens other than grain and wild yeasts. I just found instructions online somewhere, probably here. This site has some photos of what starter looks like as it grows.
It's supposedly a myth that you are catching yeasts from the air. The organisms are actually in the flour itself, so the fresher and better quality your flour is the better it will work. Stoneground whole rye flour is supposed to be the best; you can always convert it to whole wheat or whatever you like once you get the starter established, just by feeding it with a different grain.
You'll want to cover it loosely to keep dust and bugs out, but it does need to be able to breathe a bit. I use a crockery with a loose-fitting lid or just cover a glass bowl or measuring cup loosely with plastic wrap. Make sure you have it in a large enough container that it can double (or, at the beginning, maybe even quadruple) without overflowing.
Basically I mixed equal parts (by weight, not by volume) whole stoneground rye flour with filtered water and kept that at warm room temp (75-85 F or 24-29 C) for several days. I fed it every 12 hours or so until it was well-established.
It's easiest to measure by weight if you have a scale, but if not use about 1/4 cup of water and 3/8 cup of flour to start out with. Water weighs more than flour does, so you'll have about 1 and 1/2 parts flour to 1 part water by volume.
You can start out with a small amount and double the volume each time, but eventually you want to start taking out half each time you feed it, or it will take over the house. I just added another 1/4 cup water and 3/8 cup flour the first time I fed it, and then I'd take out half and add 1/4 cup water and 3/8 cup flour each time I fed it.
Now I try to keep about 2 cups of starter at any given time. Most recipes start out with a cup of starter, so you're taking out half each time you use it if you have two cups.
Mine started out with lots of bubbles but a very bad smell. That's from the wrong kind of bacteria growing in it, but don't give up on it. As the correct yeasts proliferate, they create an acid that kills the other bacteria. It may seem to have died for a day or two when this change in dominant bacteria is taking place, but it probably hasn't.
You just keep feeding it (but don't use it yet) until it smells more yeasty. That should happen in about 3 days . . . if it hasn't happened by a week or so I'd probably throw it out and start over. If it grows mold, you'll need to start over also.
It's ready to use when it smells right and it doubles in size within 12 hours. Mine usually doubles in 4-6 hours and then collapses by 12 hours, so you need to kind of watch it to see what yours does.
Now I just feed it once a day, or you can feed it and put it in the refrigerator and then it keeps about a week between feedings.
Each time you feed the starter, allow it to get to room temperature. It will probably start to bubble. I keep about two cups of starter going at a time. When I feed it, I usually take out one cup of starter and add about a cup or 200 grams each of water and whole wheat flour to that cup to make the sponge for my loaf of bread.
To the remaining cup of starter, I add 100 grams each of flour and water (about 1/2 cup of water and 3/4 cup of flour, or a little less), which will bring the amount back up to about 2 cups. Let it sit at room temperature until it starts to bubble. You can then put it back in the refrigerator if desired.
If you keep the starter at room temperature it should be fed at least once a day. If you continue feeding it every 12 hours it will have a milder flavor, but it generates a lot of starter to use up. Most people probably aren't baking twice a day every day. :)
I've let my starter go 2 days or more at room temperature without killing it, but it seems to stay healthiest if fed every day. If at any time it grows mold, it should be thrown away.
Friday, March 09, 2007
Easy homemade shortening substitute
I've found a great solution for a shortening/butter substitute.
Take your favorite vegetable oil and FREEZE it!
It will get thicker and thicker, and eventually solidifies into something about the texture of refrigerated butter. If you work quickly with cold ingredients and utensils, you can cut it in with two knives (a pastry cutter probably wouldn't be strong enough) before it melts. (Note: Liz suggests grating it with a cheese grater, which sounds like an even better idea.)
If you just put it in the freezer for 30 minutes or a few hours, it will just be thicker colder oil, but it still works pretty well if you just quickly and lightly mix it in with a utensil or your fingertips, and avoid overmixing.
I haven't tried a pie crust yet, but it makes lovely flaky biscuits and crackers.
Friday, November 17, 2006
Gluten-Free Pie Crust
Mix together:
1 1/4 cups quinoa flour or other gluten-free flour
1 Tablespoon tapioca starch/flour
1/4 tsp salt
1/2 tsp cinnamon
3 Tbs brown sugar (I use C & H; it's pure cane sugar and corn-free) or other sweetener (you probably won't need as much if any sweetener if another flour is substituted; quinoa flour needs the sugar to cut the bitterness)
Cut in until the lumps are about the size of sunflower seeds:
1/2 cup shortening (I use non-hydrogenated 100% pressed palm kernel oil vegetable shortening by Spectrum, you can use coconut oil, butter or lard.)
Add, one tablespoon at a time, until moist enough to work with:
5-7 Tablespoons ice water (5 1/2 tablespoons would have been about perfect for my crust)
Pat or roll out between two layers of plastic wrap or waxed paper. If you'll be baking the pie in the crust, bake the crust by itself for 5-10 minutes or just until the bottom is starting to get firm before adding the filling. That will keep the crust from getting soggy. You may need to put foil around the edge of the pie to keep it from getting too brown during baking.
Grainless Crackers or Pie Crust
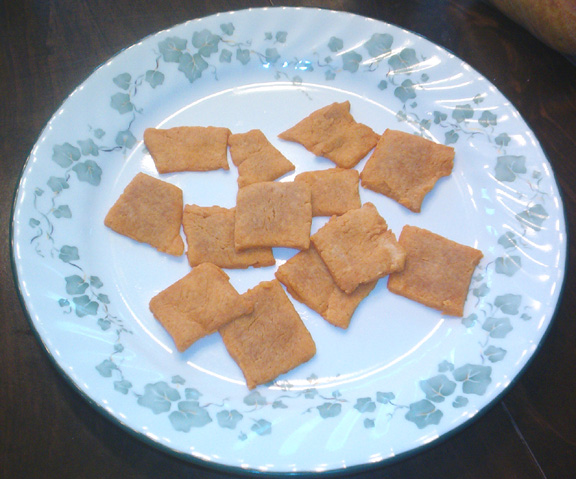
These crackers or pie crust are made with tapioca flour (made from cassava, a root vegetable), so there is no grain or seed in the recipe at all. They are gluten-free and free of most other allergens as well.
The recipe makes crackers that are nicely crispy and quite normal-looking. They have a pleasant, slightly powdery taste.
Grainless Crackers
Mix:
1 1/2 cups tapioca flour
1/2 tsp baking soda
1/8 tsp salt
Cut in:
1/2 cup non-hydrogenated shortening (palm kernel or coconut oil) or lard
In separate bowl, cream together:
1/4 cup honey or other liquid sweetener
1 Tablespoon fresh-squeezed lemon juice (you can substitute 2 teaspoons cider vinegar, or mix 1/2 tsp cream of tartar into the dry ingredients)
Add the honey mixture to the tapioca mixture and stir just until it sticks together in a ball.
This will make a very stiff dough. You can add water a teaspoon at a time until the dough sticks together if it's too crumbly, or add more tapioca flour if it's too sticky.
Roll or pat out very thin, approximately 1/16 to 1/8 inch thick, using half the dough at a time between two sheets of plastic wrap. Use a knife to cut into 2-3 inch squares, or cut with cookie cutters. You can also make little balls of the dough and flatten them between your palms, but they will not be as thin and will be more cookie-like and crumbly.
Bake at 350 degrees for 8-10 minutes. The crackers will be a light golden-brown. I used a baking sheet with an air-filled center and that helped to keep them from burning on the bottom.
Variations: Try adding your favorite spices (cinnamon, allspice, pumpkin pie spice, aniseed), more lemon juice and sweetener, or some cocoa and a little more honey. I'll update this post to include specific amounts as I experiment with variations.
Pie Crust: Reduce the honey to 2-3 tablespoons, add enough water to work, and roll out in a 9" circle. Put into pan and bake for 4-5 minutes to solidify before adding filling and baking the pie.
Friday, October 27, 2006
Cream Cheese Icing
Here's a cream cheese frosting recipe that's egg free, free of refined sugars and corn-free if you leave out the vanilla or use corn-safe flavoring.
From Desserts by Sue Gregg (Eating Better Cookbooks)
From Desserts by Sue Gregg (Eating Better Cookbooks)
Icing:
Blend together until smooth and frost completely cooled cookies or cake with:
4 oz cream cheese
1/4 cup plain nonfat yogurt
1 tablespoon honey
1/2 teaspoon lemon juice
1/2 teaspoon vanilla
Banana Sweet Potato Frosting
This icing recipe is from Bridget at Never Here Again. It's egg-free, dairy-free, corn-free and free of refined sugars--hard to find in a frosting recipe!
Mix together:
1 cup mashed sweet potato
1 ripe banana (could also use amasake)
2 T maple syrup or brown rice syrup
1 t orange juice
We can't have sweet potato or maple syrup, so if anyone tries this please let me know how it is.
Mix together:
1 cup mashed sweet potato
1 ripe banana (could also use amasake)
2 T maple syrup or brown rice syrup
1 t orange juice
We can't have sweet potato or maple syrup, so if anyone tries this please let me know how it is.
Friday, October 13, 2006
Baking Powder and Substitutes
Here are several ways to make baked goods rise without using corn or other allergens, with hypoallergenic baking powder or other substitutes:
I believe you can also use tapioca flour, potato flour, or another kind of starch instead of the arrowroot.
Or you can just leave out the starch altogether and substitute 1/2 tsp. cream of tartar and 1/4 tsp. baking soda for each teaspoon of baking power called for in the recipe.
If you are allergic to grapes or glutamates, you should be aware that cream of tartar (a.k.a tartaric acid) is a grape-derived acid salt that is a byproduct of the fermentation in wine-making.
You can often substitute vinegar (but not white vinegar if you're allergic to corn) , lemon juice or any other edible acid for cream of tartar in recipes. You'd use 3 parts vinegar or fresh lemon juice to substitute for 1 part cream of tartar, and would probably need to lessen the amount of other liquids in the recipe accordingly.
Corn-Free Baking Powder from The Complete Food Allergy Cookbook by Marilyn Gioannini
"It is easy and economical to make your own baking powder. The basic ingredients are cream of tartar and baking soda. Cream of tartar is an acid, and baking soda is a base, and when they are mixed with liquid, bubbles form. Arrowroot powder is added to help keep it free-flowing. If the mixture cakes, mash it with your finger in the measuring spoon.
"To make your own corn=free baking powder, mix together 2 parts cream of tartar, 1 part baking soda, and 2 parts arrowroot powder. Store in an airtight container, and substitute in any recipe calling for baking powder. It is more economical to buy cream of tartar and arrowroot powder at a natural foods store, especially if they are sold in bulk.
"This is a single-acting baking powder. That is, all of the rising occurs as soon as the liquid is added to the dry ingredients. For best results, mix all of the dry ingredients well, mix the wet ingredients separately, and have the pan and oven ready to go before mixing them together. Keep mixing to a minimum."
I believe you can also use tapioca flour, potato flour, or another kind of starch instead of the arrowroot.
Or you can just leave out the starch altogether and substitute 1/2 tsp. cream of tartar and 1/4 tsp. baking soda for each teaspoon of baking power called for in the recipe.
If you are allergic to grapes or glutamates, you should be aware that cream of tartar (a.k.a tartaric acid) is a grape-derived acid salt that is a byproduct of the fermentation in wine-making.
You can often substitute vinegar (but not white vinegar if you're allergic to corn) , lemon juice or any other edible acid for cream of tartar in recipes. You'd use 3 parts vinegar or fresh lemon juice to substitute for 1 part cream of tartar, and would probably need to lessen the amount of other liquids in the recipe accordingly.
Subscribe to:
Posts (Atom)