
Most surfactants in soaps are made from corn, soy or coconut, and many people with allergies or sensitive skin have problems with commercial laundry detergents.
Depending on the type of bar soap you use, this laundry soap can be made free of corn, soy, coconut and other common allergens. Any soap you can tolerate for washing yourself should be tolerated in a laundry soap. If you like, add a few drops of your favorite essential oil or tea tree oil for a nice scent and some extra antibacterial qualities.
Dry:
Grate a bar of your favorite soap to make soap flakes (many people like to use Fels Naptha; I used Kiss My Face Pure Olive Oil Soap) with a cheese grater or shred it with a knife.
Mix 1 cup (probably half a bar of soap) of soap flakes with
1/2 cup borax and
1/2 cup washing soda
Use about a tablespoon per load of wash (2 tablespoons for a large or heavily-soiled load).
Fill the bleach dispenser with vinegar if desired to help wash out any soap residue. (Use a white vinegar such as rice or white wine vinegar if you can't tolerate the regular corn-derived distilled white vinegar. Apple cider vinegar will stain your clothes.)
Liquid:
Melt 1 cup soap flakes in about 4-6 cups of water over low heat on your stove.
Add 1/2 cup Borax and 1/2 cup washing soda, and stir until dissolved and a bit thickened.
Pour into a bucket or large bowl and add about a quart (4 cups) of hot water. Stir. Add enough cold water to make about 2 gallons of soap.
Pour into containers with lids (buckets, large plastic storage containers or empty, clean jugs would work) and let cool. You can use this right away, but it may take 24 hours to thicken like regular laundry soap. If it seems too thick, use less or add more water.
I use a soup ladle and put between 1/2 cup and 1 cup in my front-loading washer. You may need to experiment with the amount needed for your washer and water quality.
Fill the bleach dispenser with vinegar if desired to help wash out any soap residue. (Use a white vinegar such as rice or white wine vinegar if you can't tolerate the regular corn-derived distilled white vinegar. Apple cider vinegar will stain your clothes.)
Notes for either type of soap:
I always add an extra rinse in addition to using the vinegar, because we have very sensitive skin in my household.
Washing soda and borax can be found near the laundry soaps in most grocery stores. Look on the top or bottom shelf in an inconspicuous place like behind a pillar. No, really. You may have to ask a store employee to help you find it, and even they may not know where it is, but most large grocery stores do seem to carry it.
Be careful with washing soda; it is caustic and will irritate your skin. You should wear gloves when handling it and wash it off right away if it gets on your skin.
Washing soda and baking soda are both made by Arm & Hammer, but they are not the same thing. Washing soda, or sodium carbonate (Na2CO3), has a PH of 11 (7 being neutral). Baking soda, or sodium bicarbonate (NaHCO3), has a PH of 8.1. Washing soda is about twice as strong a base as baking soda.
If you can't find washing soda in your grocery store, look for 100% sodium carbonate swimming pool PH adjuster in a pool supply store. Or you can contact Arm & Hammer directly.
20-Mule-Team Borax by Dial Corp. seems to be the most commonly available brand of Borax. Borax is Sodium Tetraborate Decahydrate (Na2B4O7*10H2O).
Please note that soap-based cleaners are usually not recommended for washing diapers. Supposedly they will cause buildup that makes the diapers less absorbent. Most people recommend using a detergent rather than a soap for this purpose.
Thursday, November 30, 2006
Thursday, November 23, 2006
Minimalist Pumpkin Pie
Most of the comments in this earlier pumpkin pie recipe also apply to this one. This one, however, is made with no coconut milk, and is a bit sweeter and less spicy to balance the flavors in the absence of eggs and dairy-like products.
First, make a pie crust. Gluten-free recipe here, grain-free version here.
Put crust in pie pan and bake for 5-10 minutes or until crust is just a bit firm on the bottom.
Combine in blender:
2 cups mashed cooked pumpkin
1 1/2 tsp cinnamon
3/8 tsp ginger
1/8 tsp cloves (heaping, more like 3/16 tsp)
1/8 tsp nutmeg
1/4 tsp salt
1/4 cup tapioca flour
3/4 cup honey
1/4 to 1/2 cup water or milk substitute. The amount of liquid needed will depend on the texture of your pumpkin and how much liquid is in it. Add just enough liquid to process the mixture in the blender--you don't want to make it watery.
Blend until smooth.
Pour into pie crust and bake for 1 hour at 350 degrees.
Chill before serving.
Monday, November 20, 2006
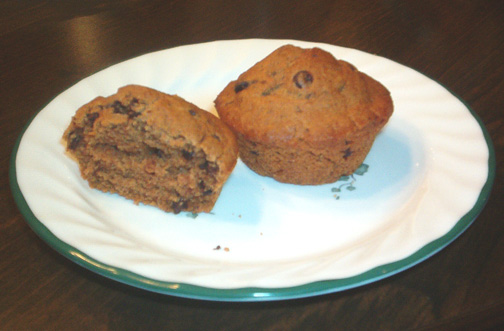
Chocolate Chip Muffins
Mix together dry ingredients:
2 cups flour (I used 1 cup King Arthur traditional whole wheat, 1/2 cup whole barley flour, 1/2 cup tapioca flour. If using a gluten-free flour such as rice or amaranth, I suggest using 1/3 to 1/2 the total amount of tapioca flour.)
1 1/2 tsp cream of tartar (or 4 tsp lemon juice or cider vinegar)
3/4 tsp baking soda
1/2 tsp salt
3 Tbsp turbinado sugar or C & H brown sugar
In another container, blend together
1 Tbsp flaxseed meal mixed with 3 1/2 Tbsp hot water & heated until gelled
3 Tbsp oil (I used grapeseed oil)
1 cup water or your favorite milk substitute
Make a hollow in the top of the dry ingredients. Add wet ingredients all at once and quickly mix just until barely blended.
Stir in approximately 1/4 to 1/2 cup of Enjoy Life chocolate chips, or the fruit or nuts of your choice (optional).
Spoon into oiled muffin pan, filling cups about 2/3 to 3/4 full.
Bake at 425 degrees for 20 minutes.
Makes 12 regular-sized muffins.
Saturday, November 18, 2006

Pumpkin or Squash Pie Reinvented

This pumpkin or squash pie is free of dairy, soy, eggs, gluten, rice and most other allergens. It's also vegan.
The pie has a very silky texture, softer and more pudding-like than a traditional pumpkin pie. To make a grainless pumpkin pudding, just bake the filling with no crust.
I was going to try making it without the baking soda and cream of tartar, and calculate the baking time more carefully. But then I discovered that I'd developed an allergy to coconut, so I won't be making it again.
If you try it, please do post any improvements or adjustments you make in the comments.
Feel free to adjust the spice amounts for whatever you usually use in a pumpkin pie. Remember that you're not adding the eggs, so you'll probably want a lesser amount of spice in a pie than one with eggs.
Pumpkin or Squash Pie
First, make crust. Gluten-free recipe here, grain-free version here.
Put crust in pie pan and bake for 5-10 minutes or until crust is just a bit firm on the bottom.
Pie filling:
Mix together dry ingredients:
1/4 cup tapioca flour
1 1/2 tsp ground cinnamon
1/4 tsp ground ginger (I measured this heaping)
1/4 tsp ground nutmeg
1/4 tsp ground cloves (measured scant)
1/4 tsp salt
1/2 tsp baking soda
1/4 tsp cream of tartar (if allergic to grapes or sulfites, substitute about 1/2 to 1 tsp lemon juice or cider vinegar with the wet ingredients)
Combine in a separate bowl:
1 15-oz can Libby's Pure Pumpin (not pumpin pie filling--just plain pumpkin) or 1 1/2 to 2 cups squash puree*
1/2 cup coconut milk (I use Trader Joe's light coconut milk; it's corn-free and lower-fat, too) or other milk substitute (for a recipe using plain water, see here)
1/2 cup pure honey or other liquid sweetener
Blend pumpkin mixture into dry ingredients until smooth, and immediately pour into pie crust.
Bake at 350 degrees for 30-45 minutes or until set in the middle. A knife will not come out clean when it's finished; it will still be very gooey in the middle until chilled. Don't be concerned if it puffs up a bit in the middle and then collapses as it cools.
Chill before serving.
* If you want to use a fresh pumpkin (or any kind of winter squash such as butternut or acorn squash), you can make your own squash puree.
Bake it whole (or cut in half face-down with 1/2 inch of water in the pan) at 350 degrees in the oven until tender. Scoop out the flesh and mash it with a potato masher.
Then use the blender to process it into a smooth puree. You can add all the other ingredients to the blender and just mix it all up in there if you like instead of mixing wet and dry ingredients separately.
Friday, November 17, 2006
Gluten-Free Pie Crust
Mix together:
1 1/4 cups quinoa flour or other gluten-free flour
1 Tablespoon tapioca starch/flour
1/4 tsp salt
1/2 tsp cinnamon
3 Tbs brown sugar (I use C & H; it's pure cane sugar and corn-free) or other sweetener (you probably won't need as much if any sweetener if another flour is substituted; quinoa flour needs the sugar to cut the bitterness)
Cut in until the lumps are about the size of sunflower seeds:
1/2 cup shortening (I use non-hydrogenated 100% pressed palm kernel oil vegetable shortening by Spectrum, you can use coconut oil, butter or lard.)
Add, one tablespoon at a time, until moist enough to work with:
5-7 Tablespoons ice water (5 1/2 tablespoons would have been about perfect for my crust)
Pat or roll out between two layers of plastic wrap or waxed paper. If you'll be baking the pie in the crust, bake the crust by itself for 5-10 minutes or just until the bottom is starting to get firm before adding the filling. That will keep the crust from getting soggy. You may need to put foil around the edge of the pie to keep it from getting too brown during baking.
Grainless Crackers or Pie Crust
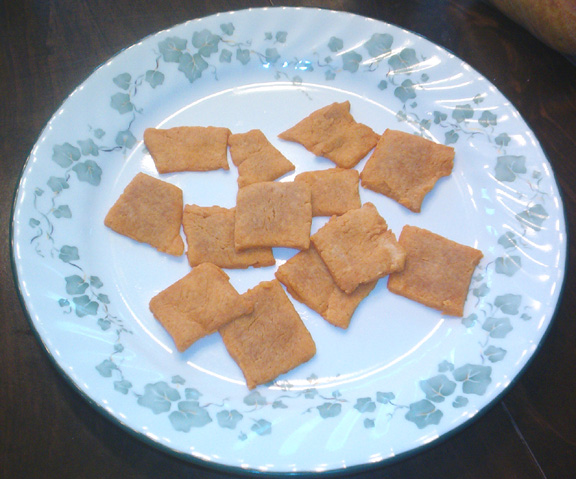
These crackers or pie crust are made with tapioca flour (made from cassava, a root vegetable), so there is no grain or seed in the recipe at all. They are gluten-free and free of most other allergens as well.
The recipe makes crackers that are nicely crispy and quite normal-looking. They have a pleasant, slightly powdery taste.
Grainless Crackers
Mix:
1 1/2 cups tapioca flour
1/2 tsp baking soda
1/8 tsp salt
Cut in:
1/2 cup non-hydrogenated shortening (palm kernel or coconut oil) or lard
In separate bowl, cream together:
1/4 cup honey or other liquid sweetener
1 Tablespoon fresh-squeezed lemon juice (you can substitute 2 teaspoons cider vinegar, or mix 1/2 tsp cream of tartar into the dry ingredients)
Add the honey mixture to the tapioca mixture and stir just until it sticks together in a ball.
This will make a very stiff dough. You can add water a teaspoon at a time until the dough sticks together if it's too crumbly, or add more tapioca flour if it's too sticky.
Roll or pat out very thin, approximately 1/16 to 1/8 inch thick, using half the dough at a time between two sheets of plastic wrap. Use a knife to cut into 2-3 inch squares, or cut with cookie cutters. You can also make little balls of the dough and flatten them between your palms, but they will not be as thin and will be more cookie-like and crumbly.
Bake at 350 degrees for 8-10 minutes. The crackers will be a light golden-brown. I used a baking sheet with an air-filled center and that helped to keep them from burning on the bottom.
Variations: Try adding your favorite spices (cinnamon, allspice, pumpkin pie spice, aniseed), more lemon juice and sweetener, or some cocoa and a little more honey. I'll update this post to include specific amounts as I experiment with variations.
Pie Crust: Reduce the honey to 2-3 tablespoons, add enough water to work, and roll out in a 9" circle. Put into pan and bake for 4-5 minutes to solidify before adding filling and baking the pie.
Shampoo and Toothpaste Substitutes
Virtually all soaps, shampoos and toothpastes contain ingredients derived from corn, soy, and/or coconut. For someone allergic to all three, or with multiple chemical sensitivities (MCS) the options are extremely limited.
Here is a way to get your hair and teeth clean with good old baking soda. This is about as hypoallergenic as you can get.
Shampoo Substitute
Take about 2 tablespoons of baking soda (bicarbonate of soda) and add enough water to make a paste. Rub into your scalp and rinse.
If desired, follow with an acid rinse to restore PH balance: Use about 2 tablespoons fresh-squeezed lemon juice or apple cider vinegar mixed with about a cup of water, being sure to get the ends of your hair.
Rinse with plain water.
Toothpaste Substitute
You can use plain baking soda or a baking soda/additive-free salt mixture as toothpaste.
Tuesday, November 14, 2006
Roasted Vegetables or Tubers

Thanks to some commenters on the Purple Puzzle Place blog, I've discovered a new favorite way to cook many kinds of vegetables: roasting.
Roasting works well for cauliflower and for just about any kind of root vegetable. So far I've tried it with potatoes, carrots, jicama, and lotus root, as well as our favorite cauliflower. Yams, taro, turnips, squash, parsnips, cassave (yuca) roots, and many other vegetables should work just as well.
The basic recipe is pretty simple:
Preheat the oven to about 475 degrees.
Cut your vegetable(s) of choice into approximately 1 inch chunks. Put them into a plastic bag and drizzle your favorite healthy oil over them. Just shake and squish the bag to evenly distribute the oil.
I use about 1/4 cup of olive oil for a whole cauliflower or 6 potatoes--you want just enough to coat the vegetables.
Spread the oiled vegetables in an uncovered baking dish. I usually use a 9 x 13 glass dish. If you can get the vegetables in a single layer they will cook a little better, but if not just spread them as thinly as possible and stir a little more frequently while cooking.
Bake at 475 for about 15 minutes, then stir. Bake for another 15-30 minutes (depending on the vegetable) or until the vegetables are getting tender and browning on the edges. Stir every 10 minutes or so.
Some vegetables I like to cook until they're getting almost black on the tips and edges, but you can adjust this to your taste. Cauliflower is particularly good this way, as it carmelizes and develops a savory rich flavor with hints of sweetness. Even my family members who "hate" cauliflower will eat it roasted this way.
For extra flavor, you can add some leeks or onion, a clove or two of minced garlic, herbs, spices or salt and pepper. I like to mix various vegetables and flavorings for variety, and just sprinkle with sea salt to taste.
You can chop the vegetables and coat them with oil ahead of time. I've done this with olive oil, garlic and dill on potatoes and carrots. The oil coating kept the potatoes from browning and they absorbed the flavors well. I cut up a big batch and refrigerated half to bake later, and it tasted just as good baked two days later as it had originally.
Non-Dairy Clam Chowder (or Not-Potato Soup)
New-England style clam chowder. It was one of those foods I thought I'd never enjoy again, at least for a very long time.
But, thanks to The Complete Food Allergy Cookbook: The Foods You've Always Loved Without the Ingredients You Can't Have, bought for me by DH, the impossible is happening fairly frequently around here.
This clam chowder is dairy, gluten, soy and nightshade free. It can be made without the clams for you vegans out there, too. (In that case, it's not clam chowder; it's mock potato soup.)
With no dairy and no nightshades, you can finally eat clam chowder again.
#####################
The book gives several variations on the recipe, including using other milk substitutes. I think next time I'll use a bit less onion, but I really enjoyed the soup.
I think I almost prefer the taste of cassava to that of a regular potato. It has a very similar taste and texture, but just slightly sweet and without that sort of sour flavor that potatoes sometimes have. It is, however, much tougher to cut up and takes longer to cook, and you have to be sure to remove all the little woody bits.
I like this food allergy cookbook. Rather than just giving recipes (although it has lots of those, too) the goal is to teach you to substitute and improvise so that you can alter existing recipes to meet your dietary needs. I highly recommend the book.
The information is truly helpful and fairly exhaustive, and almost every recipe I've tried so far has become one to add to the oft-repeated stash of favorites. There's also some helpful information about identifying and coping with food allergies in general.
The book tells you how to cook without the things you may need to avoid--including preservatives, animal products, dairy, eggs, soy, gluten, corn and other grains, sugar, nightshade plants, and even chocolate. The only area I noticed in which it is really lacking is that of tree nut and legume allergies; several of the recipes require either soy or some kind of tree nut (none call for peanuts), and cooking without tree nuts is not particularly discussed.
This cookbook has quickly become my most often-used cookbook. Especially the recipe for Universal Muffins--my kids and I love that one, and it's so very flexible. I make it sometimes several times a week.
But, thanks to The Complete Food Allergy Cookbook: The Foods You've Always Loved Without the Ingredients You Can't Have, bought for me by DH, the impossible is happening fairly frequently around here.
This clam chowder is dairy, gluten, soy and nightshade free. It can be made without the clams for you vegans out there, too. (In that case, it's not clam chowder; it's mock potato soup.)
With no dairy and no nightshades, you can finally eat clam chowder again.
#####################
Clam Chowder (From The Complete Food Allergy Cookbook, by Marilyn Gioannini)
1 hour * 4 servings
This classic New England style clam chowder, thick with "potatoes", onion, and "cream", tastes exactly like the real thing. The "potato" is yuca (cassava) root, available in most supermarkets; the "cream" is cashew milk.
Absolutely delicious!
About 1 lb. yuca root
1/8 tsp. salt
2 Tbs. vegetable oil
1 large onion, chopped
1/3 cup raw cashews
1 (6 1/2 oz) can minced clams with juice (check labels when shopping--some have preservatives)
salt and pepper
Peel yuca root and dice into 1/2 inch cubes. Cover generously with water, add salt, and bring to a boil in a medium saucepan. Simmer, covered, 30 to 40 minuts, or until very soft. Stir occasionally. While the yuca is cooking, heat vegetable oil in a medium skillet. Add chopped onion and saute until soft. Add the onion to the saucepan with the yuca root.
Put cashews into blender container. Blend briefly until they are broken up. Aded 1 1/2 cups of water and blend on high until cashews are completely pulverized, about 3 minutes. When the yuca is soft, add clams to the saucepan. Add cashew milk and heat just until hot. Serve immediately. Add salt and pepper to the bowl to taste, and serve with toast.
The book gives several variations on the recipe, including using other milk substitutes. I think next time I'll use a bit less onion, but I really enjoyed the soup.
I think I almost prefer the taste of cassava to that of a regular potato. It has a very similar taste and texture, but just slightly sweet and without that sort of sour flavor that potatoes sometimes have. It is, however, much tougher to cut up and takes longer to cook, and you have to be sure to remove all the little woody bits.
I like this food allergy cookbook. Rather than just giving recipes (although it has lots of those, too) the goal is to teach you to substitute and improvise so that you can alter existing recipes to meet your dietary needs. I highly recommend the book.
The information is truly helpful and fairly exhaustive, and almost every recipe I've tried so far has become one to add to the oft-repeated stash of favorites. There's also some helpful information about identifying and coping with food allergies in general.
The book tells you how to cook without the things you may need to avoid--including preservatives, animal products, dairy, eggs, soy, gluten, corn and other grains, sugar, nightshade plants, and even chocolate. The only area I noticed in which it is really lacking is that of tree nut and legume allergies; several of the recipes require either soy or some kind of tree nut (none call for peanuts), and cooking without tree nuts is not particularly discussed.
This cookbook has quickly become my most often-used cookbook. Especially the recipe for Universal Muffins--my kids and I love that one, and it's so very flexible. I make it sometimes several times a week.
Thursday, November 09, 2006
Root Vegetable Chips
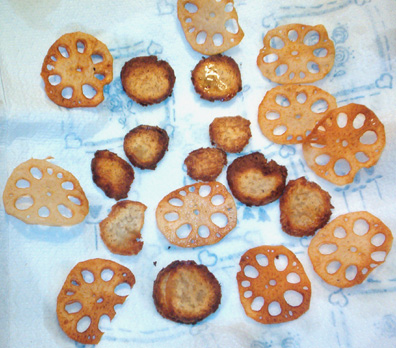
These non-potato chips are nightshade free and can be made free of any allergen by adjusting the type of root vegetable, oil and seasoning used. They are remarkably easy, and have a satisfying crunch and nice flavor.
You can use just about any root vegetable--parsnip, taro, and yam are some I've seen used. One I haven't seen used before is lotus root. It works very well, and as an added bonus the chips are very pretty to look at also.
I made some chips last night out of baked taro and raw lotus root, sliced thinly. The taro didn't work as well--perhaps because I sliced the chips too thickly and cooked them at too high a heat. Or possibly because I had baked the taro previously for fear of undercooking (taro root is not edible if not fully cooked, and can irritate hands and mouths if not handled raw).
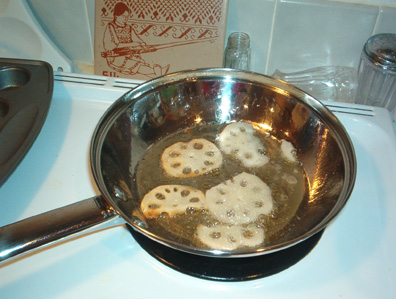
The lotus chips turned out beautifully. I peeled the lotus root and sliced it thinly. Then I heated about 1/4 inch of grapeseed oil in a stainless steel pan and fried the slices on both sides just until golden brown.
I started out with too high of a temperature initially, and they got a little too brown.
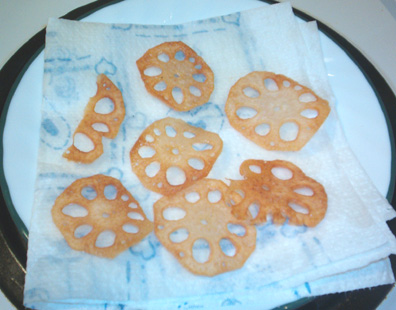
With the second batch I turned the heat down to about 4 on a scale of 1-10. They cooked more slowly, but ended up nicely crispy without getting burnt.
I forked them out onto a paper towel, which absorbed some of the extra grease. Then I sprinkled them with salt and we ate them.
Next time I think I'll try lightly coating them with oil and baking them in the oven.
Wednesday, November 08, 2006
Lotus Root

I've discovered a new food Baby E will eat and seems to tolerate well: lotus root.
########
It's the root of a flower, and the taste and texture are something akin to a cross between potato and water chestnut.

I think Baby E likes it because it has little holes to stick her fingers through.

It's a pretty vegetable, and interestingly different. So far I've tried adding it to a mixed stir-fry and simmering it in water.
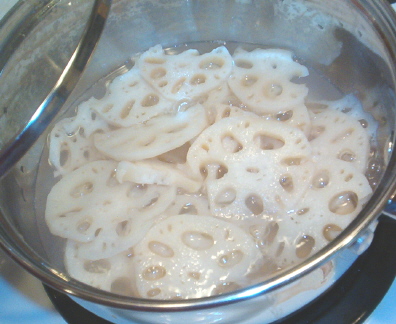
The stir-fry was more successful. I think it needs to be mixed with other flavors and textures to really shine.
Taro root can also be eaten raw in salads, but none of us were crazy about the taste and texture of it raw.
The only place I've found it so far is at Whole Foods.
Subscribe to:
Posts (Atom)